Pictures first, how-to for the main card only at the end. I'm sure if you get through the how-to on the card, you can figure the other things out or come up with your own. I'd love to see your ideas/variations.
THE CARD
 |
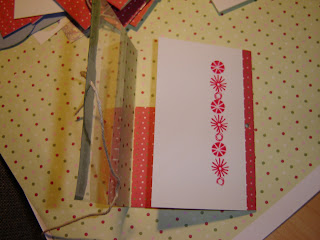
| Front of Card. The candy looking stripe was stamped on acetate using Blazing Red Staz-On Ink. |
 |
| The same candy stripe image was also stamped on the inside (giving the double image you see in this picture). |
 |
| Fully opened card. |
 |
| The gap between the white and green papers is the acetate. You can clearly see the candy stripe image stamped on the inside here. |
 |
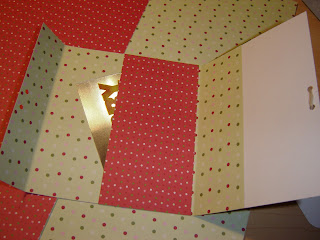
| Just the inside. |
THE COLLECTION
Thank you cards and gift card/money holders collection (close ups and more details below)
THE GIFT TAG
 |
| I did not stamp the candy stripe on the white card stock, only on the acetate. |
THE GIFT CARD/MONEY HOLDER
 |
| Small gift card holder - more of a wallet size. |
 |
| Opening the wallet-sized version. Candy stripe is only stamped on the white card stock |
 |
| The pocket is in the center attached with adhesive on the left and bottom to fit money or a gift card from the store of your choice. |
 |
| Larger self pocket - the white you see through the acetate is the pocket that holds the gift card or money. |
 |
| Candy stripe image is only stamped on the white card stock. |
 |
| Opened version of the larger gift card/money holder. The white part is attached with adhesive and serves as the pocket. |
 |
| Wasn't sure how clear the other one was with the background of the center panel being the same. |
 |
| No acetate was used in this version. |
 |
| You can see the gift card peaking out. The pocket is adhered on the inside, top and bottom, so the gift card isn't going anywhere. |
THE THANK YOU CARD
THE HOW-TO
SUPPLIES
White card stock
Green card stock
Heidi Grace Designs (HG EG Jolly Crdstk Minido)
Twine (I used a thin bracelet making twine)
Corner Rounder
Stamps of your choice (you will want to use a clear stamp and block for the acetate and inside image)
Adhesive
Acetate
Staz-On Ink (color of your choice, I used Blazing Red)
Black ink (your choice)
Green ink (your choice)
HOW-TO:
When making cards in quantity, I usually do a mass assembly line. I will cut all my paper down to size and tear it.
I started with the base card folded to the size I wanted: 8"x~5-3/4", then cut off the ~3".
Cut your card stocks as follows:
White: 8"x4-1/2"
Green: 2-1/2"x4-1/2"
Heidi Grace: 1-3/4"x4-1/2"
Twine is also pre-cut to: 6".
Square image on the front (Joyeux Noel) was stamped first on 1-3/4" squares (the leftovers from cutting the 3" off the main card), then the corners were rounded.
Stamp image that will go on acetate and white card stock on the inside of the white card first. The image should go just under where white card stock comes to (just below that line).
Attach twine to back side of green paper.
Attach your torn green paper.
Attach acetate to green paper.
Stamp image that is on inside of card on acetate.
Attach Heidi Grace paper.
Tie knot of twine to twine attached to green paper. I find I use less string if I attach the initial string/twine/ribbon, then tie a bow/knot to the location I want it...it can slide, so I can move it afterwards also.
Stamp your inside sayings.


No comments:
Post a Comment